Making Noise with QR Codes and Chrome

Image result for monkey with a tool belt and the noisy problem

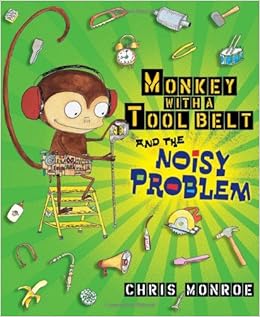
After reading, Monkey with a Tool belt and the Noisy Problem by Chris Monroe, students were engaged in a learning activity that focused on sounds. In the book, Chico can not figure out what is making the “Arooga Boom Boom Clang Clang” sound in his tree house. He sets out to find the sound and ends up finding an elephant stuck in his laundry shoot. Students loved the problem solving and the introduction of a new character. Clark the elephant got lost and landed in Chico’s tree house instead of Elsa’s.

The STEAM learning extension included content in making, music, art, technology and engineering. Third and fourth grade students used their Chromebooks to complete their projects. These classes created a sound using materials in the Maker Studio and recorded them on the app Mic Note. The process of going to the web store and adding an app to the drive was all part of the instruction. Students then learned how to export the sound and make the copied link shareable. This link was then placed in the QR code generator that they had downloaded. Once the QR code was generated, students copied the image and placed their finished product on the google doc located in the STEAM google classroom.

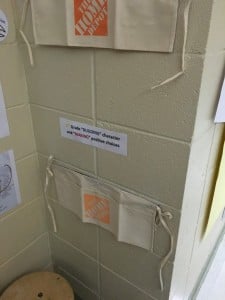
Once QR codes were printed and cut out, they were placed on Chico’s tree house. Understanding the purpose of listening and how sounds are all around us encouraged students to place the QR code according to what room in Chico’s house he might hear their particular sound.

Problem solving, learning new technology, creating and producing a product to share with the school at large was an exciting learning experience.

Lab Coat Day: “Ada Twist, Scientist” by Andrea Beaty

When Everyone Wears a Lab Coat…. Everyone Feels Like a Scientist!

Thank You Andrea Beaty for giving us, ADA TWIST, SCIENTIST!

Last year, we introduced students to the author Andrea Beaty. Her books, Rosie Revere, Engineer and Iggy Peck, Architect were a focus in literacy and making for our school year (2015-2016).  Students were exposed to a real Rosie and learned all about architects and engineers. At the end, our students participated in a SKYPE with Ms. Beaty. During our SKYPE session she revealed the release of her new book! ADA TWIST, SCIENTIST.

Lesson Plan Here

This book was a HIT with students. Rosie and Iggy joined us for a day in the science lab.  Students in grades k-4 participated in a reading of the book along with a science activity that Ada performs in her classroom with Ms. Lila Greer. “What is that smell?” was the question Ada was trying to solve. Watch and see the engagement and excitement of scientists in the making.

“Building” Character and “Making” Good Choices

Integrating management and motivation is a way to support the whole school culture.  After reading, Monkey with a Tool Belt by Chris Monroe, we implemented a positive reinforcement opportunity for students.  Using the idea of tools as a lead in from the text, we developed “tool badges” that can be earned based on behavior expectations school wide. These tools help us “build” character and “make’ good choices. Tools include, Routines, Responsibility, Respect, Safe (from our S3R’S district initiative) along with collaboration, listening, critical thinking and innovator. 

Students have several ways to earn the badges. In the Maker Studio they have grade level toolbelts to collect their badges in based on behavior during that special time. Students can also earn badges to place in their classroom toolbelt. At the end of the nine weeks the tool belt will be evaluated, “What is the value of your toolbelt?”. Each badge is a different shape and carries a different numerical value. The grade level with the highest toolbelt value will get to choose from a set of predetermined incentives.

Incentives for Maker Badges include “self-select” building/making or free build in MinecraftEDU.

What is the value of your toolbelt?

What is the value of your tool belt?

img_1871


**Grade level teachers can use the incentives however it works best in their classroom.  Next semester we will explore digital tool badges.

Plastic 6: 3D Holograms

The Atlanta Science Festival was a comprehensive arrangement of Science workshops, family activities as well as educator learning opportunities. Seeking professional development and living with a growth mindset sends us all over the country. Sometimes the opportunities are in your back door or neighboring state. Sometimes those opportunities are in the classroom next to you.  With a variety of sessions and events, we had to map out what would be best for STEAM learning and collaboration. After driving for half an hour and ending up in a warehouse district, I must say we were a little hesitant but then remembered some of our best learning has been when it was least expected. With only 5 cars in the parking lot and two hours ahead of us, we entered. At first glance it looked like we would know about most of the materials being shared but that is noreason no to seek intently. To listen. To Reflect.

A conversation about plastic #6 and how use plastic and heat to create art reminded us of a project our art teacher just completed as a part of her curriculum andSTEAM participation. Several times this week the term “oldie but goodie” has been used in a variety of conversations. In a session on PBL, oldie but goodie technology resources were revisited. We don’t always have to replace something that is working or that serves a purpose.

During this session on Makerspaces, The oldie but goodie motto was brought to life with the remembrance of “Shrinky Dinks”. Jewelry making, badges and ornaments were all innovative ways to use Plastic #6 using the same heating concept with plastic as used with “Shrinky Dinks”. Fabrication of jewelry provides making opportunities that are completely student driven by individual artistic imagination.


plastic 6 jewelry

A final use of plastic in making was the 3D hologram. The 3D hologram uses an iPhone or iPad to project the image onto a folded piece of plastic that simulates a hologram. This is not a “Shrinky Dink” activity but uses recycled plastic to (CD cases , old transparencies, and I am sure your imagination can think of others) create a hologram effect. In addition, we learned how to make the videos for use with the plastic hologram attachment. This is another opportunity for students to use individual creativity to publish a final piece and communicate understanding.

hologram4_3395957k

A great weekend of learning and bringing back. Thanks to all those that shared and learned with us.

Maker Week 2016

MakerprojectsMaker Week was a huge success. Students across all grades, K-4, were engaged in student centered making. As a part of the week, teachers and students worked to build a Boat Launch with an emphasis on using recycled materials. Samford University, pre-service teachers worked along side the STEAM facilitator and other faculty to gather materials for over 350 students to make boats to launch. Milk containers along with many donated recyclables made the experience creative and innovative for students.  Thank you @Scrapkins for the idea! Students rotated during PE to build and make with the new Imagination Playground and launch their boats. Data collection was part of the experience along with many discussions on boat redesign.  Second through fourth grade students recorded data on how fast their boat traveled down the launcher and kindergarten recorded data on a Venn diagram (did your boat float, did your boat make it the other side of the pool and both).

Dr. Seuss was also a theme within the week that allowed students to make related to literature.

Classroom teachers were active in the MakerStudio facilitating student making. Grades K-4 used the space to facilitate learning in the classroom as well as free design. Free design included student made mazes for robots to be coded through, canoodles, pixelation with pinblocks, drone challenges,a crane with rigamajigs and 3d printing with tynkercad designs and structures with sticklets.

Makerfest rounded out the week with over 65 students attending a Friday night event with making for all ages. Younger students built and made with various materials. The new IO blocks were a hit with K-1 students while drone challenges and rigamajig contraptions were leaders with the older students.

Successful Implementation of Makerspaces – Part I

Success with integration and implementation of Makerspaces is quite simple.  Simple with respect to pedagogy, vision, tools and buy-in. Not so simple if these aspects are not in place. Technology (laptops, robots, ipads etc.) and various materials without pedagogy will impact the success of the space.  For some reason, the onset of a makerspace for many focuses on money, what others have, and the things/devices rather than on the process.  The heart of success with any new initiative/movement can be found in leadership and passionate teachers with good sound pedagogy and practices.   Sustained implementation requires teaching (knowing the curriculum) first followed by the tools.  A passionate, self-seeking teacher(s)/leader(s) who studies the curriculum, seeks professional development, shares and collaborates with others via their PLN and conferences is the ONLY true key to a successful initiative.

Second is the VISION and the expectation. The culture of a school is very instrumental in success. Leadership that supports “making” as a culture drives the expectations of the faculty.  What is the vision and the branding of the school and how will it impact the culture of the school.

Third, what tools (not tech toys) will have the most success in the implementation phase.  You want everyone to participate, use, and be willing to learn whatever the new tool might be.  Success for the teacher needs to come early.  Many times, we have to buy products ahead of time and test them before it is rolled out.  When you decide on the tools, giving good sound examples with the curriculum standards will always attract teachers.  If it is seen as a toy, teachers will see it as one more thing and not part of the curriculum.  Technology is there to help teachers and enhance the curriculum.

Lastly, leaders must know how to generate buy-in from teachers.  It is important to implement in a way that fits your school’s beliefs and educational culture (not someone else’s vision or design).  All schools are different.  You’ll get nowhere with a one-size fits all approach.

Success Steps:

1.  Pedagogy

2.  Vision and expectation

3.  Technology

4.  Buy – In

*This is part 1 of a series of blog post on Makerspaces.  More to come on Learning Environments and their purpose.